How To Create A Facebook Business Page
Create a Business Facebook Page
 Facebook is the world's largest social media service with over 1.25 Billion active users. Consumers are using Facebook not only for social interaction but also for finding businesses, products, and brands. Facebook's "like" and "share" features are also extremely helpful in increasing awareness of your business. A business Facebook page will allow you to promote your business, understand your target audience, interact with customers, post updates and promotions, and is great for search engine optimization! With categories ranging from local businesses and artists to corporations and charities, all businesses should have a Facebook page!
To create a Facebook Business page, we first recommend creating a business manager account instead of creating a page from the facebook login screen at facebook.com. If you do not create a page from the business manager account, your Facebook business page will be linked to a personal account. If you do not have an account you will need to create one by following our business manager guide.
Step 1: Start From The Facebook Business Manager
To begin creating your Facebook Business Page, you will need to access your Business Manager account first. Visit business.facebook.com to reach your Business Manager login page. You will need to sign in by inputting your work email and your password.

Step 2: Create A New Facebook Page
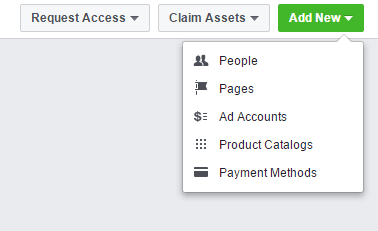
After logging in, look to your top right-hand corner and click on "Add New." A list of assets will drop down and you want to click on "Pages."
Step 3: Choose Your Category
Now, you will be asked to choose a category. Select the one that best fits your goal. Depending on what category you choose, you will be asked to fill out some additional information regarding the page you want to create. For example, if you want to create a page for your local business, you will be asked to fill out information such as the page name, category, street address, city, and zip code. But if you want to create a page for your brand or product, or for your company, organization, or institution, you will only be asked for the page name and its category. If you are running ad blocker, we recommend turning it off as it may prevent some functionality during setup.
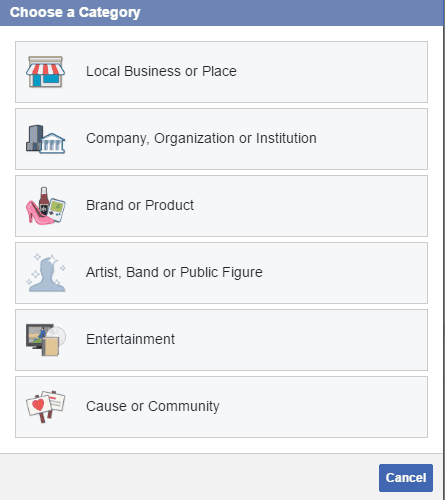
The remainder of this guide will follow the Local Business or Place option. If you select another option some of the settings will be different.
Step 3: Enter Your Page Name & Choose A Category
Once you have entered your page name and choose a more detailed category you can continue the setup. The name you choose will automatically be used as part of your facebook URL. Make sure you get it right because it will be painful to change later. Use your business name and be sure to double check the spelling before continuing.
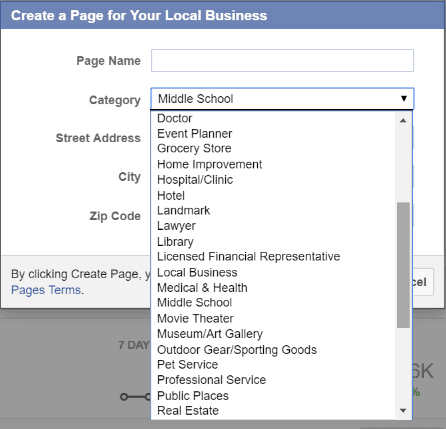
Please note that your screen option will be different based on your option in the prior step. For example, if you choose "Company, Organization or Institution" This step will only require you to enter your page name and to select a category.
Step 4:Complete You Page Setup
Once you've chosen the appropriate category and filled in the necessary information, you're ready to begin setting up your page. There are steps in setting up your business page with the first two being essential so your business can be found and looks professional.
The About Section
First, you want to edit your "About" section. This is where you include basic information about your business. Some ideas on how to edit this section would be to include what your business does or a very brief history. This information will be used to rank pages in search engines. In this section, you can also choose your unique Facebook URL which is usually your business name.
Upload Photo
Upload your page's profile picture. You can upload images from your computer or pull images from your website by putting in your website URL. Your profile picture should be an accurate reflection of your brand and what your company represents. To make things simple, use your company logo.
Add to Favourites List
Next, make your page easily accessible when using your account. This third stage is to automatically add your page to your Facebook account's favorite list so it is easily accessible with a click whenever you are on Facebook. This can be very helpful especially when facebook makes an update or changes some options.
Payment Method for Advertising
The fourth stage is where you can add a payment method to advertise on Facebook if you so choose. Again, you may skip this step my clicking on "Skip."
Step 5: The Finishing Touches & More Content
After completing the steps, you will now be directed to your business page. This is how it will be seen to the Public. To get started with your business page, we recommend starting with your cover photo. By clicking on "Add a cover" on the top right corner of the page, your cover photo is also used to represent your business. You may also create an album you want displaying on the page such as recent work or promotions by clicking "Create an Album" on the bottom left of the page.
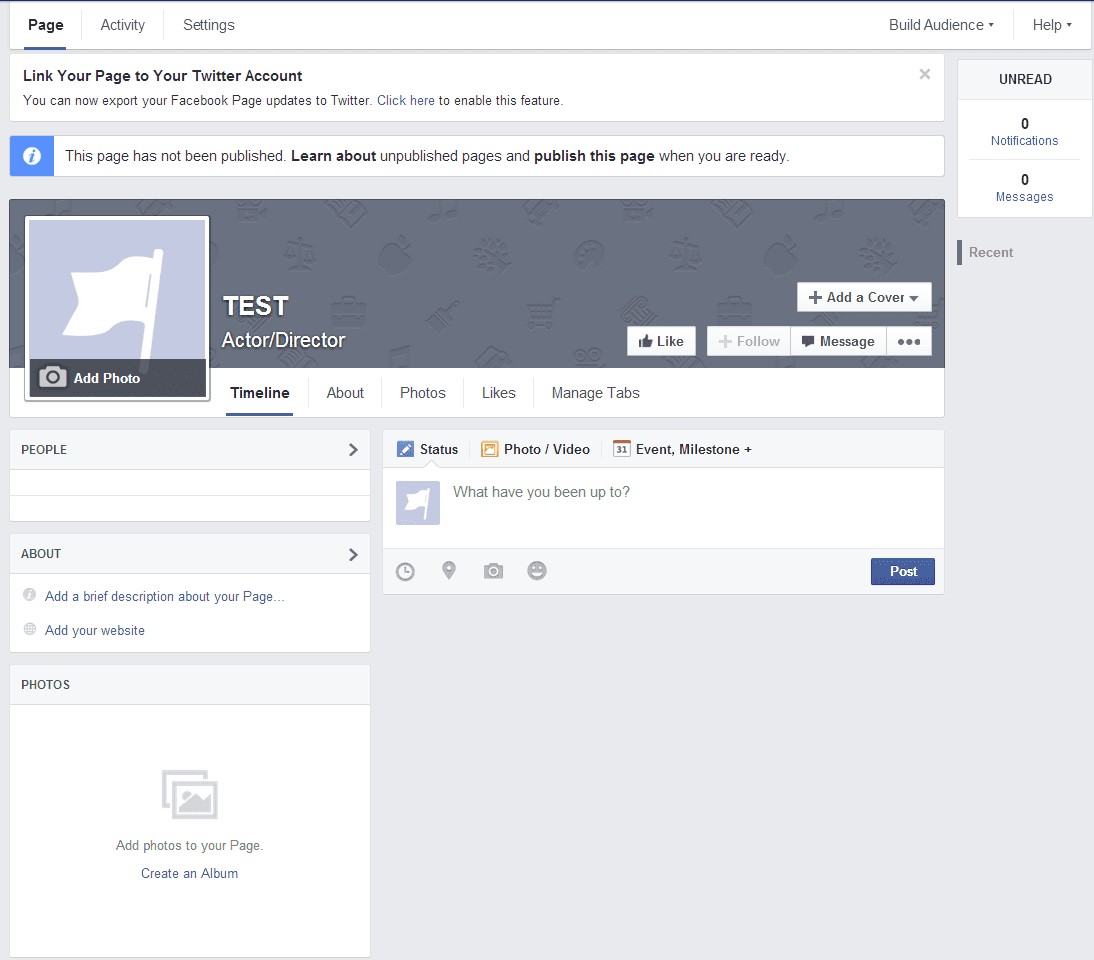
Your facebook business page comes with customizable tabs that make you and your page visitors better find what they are looking for. It also makes your page look organized and professional. As your business grows, you will find yourself creating more tabs.
Your Facebook Page Tabs
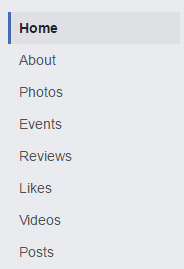
Provide prospective customers with as much information as your can about your business, its location, and services. Here is an example of the different kinds of tabs you can create. It's recommended that you add your hours, contact information, price ranges, and parking information. Photos and vidoes are fantastic ways to showcase your business. If you have photo and videos handy be sure to add them to your facebook page.
That's it! You now have a Facebook Business Page. Start Growing your page by inviting your friends to like and share your page as well as encouraging customers to do the same. In no time, your Facebook business page will become a great tool for your business that will help you grow!
Need More Help?
We hope you found this how to useful if you do require assistance setting up the Facebook page we do offer this as a service. Digital Shift will create a professional Facebook page with a high-quality custom cover photos that will not only match your brand but strengthen it. Visit our Facebook Business Page Services to learn more about our Facebook page service!
