How To Create A Facebook Business Manager Account
The All-In-One Facebook Business Manager
This step-by-step guide will teach you how to create a Facebook Business Manager account. Businesses can securely share and control a variety of assets on Facebook without venturing into personal territory. From client ad accounts and pages to controlling what your coworkers can see about you, Facebook's Business Manager has become a convenient tool for growing businesses everywhere. Unsure whether your company should sign up for Business Manager? Consider the following questions:
- Does your company need more than one ad account?
- Do you need to assign permissions to people you work with?
- Do you or your employees need access to pages or ad accounts of your growing client base?
- Does your company work with a partner or agency?
Facebook Manager makes it easier for you and your team to access your company's ads and pages and prevents Facebook from suspecting any strange activity. Now that you have a better idea whether or not Business Manager is right for your company, are you ready to get started?
Step 1: Create An Account
Go To The Business Manager Website
Sign into your personal account through Facebook. Think of Business Manager as another app or service that you would access through your personal account. If you're still a bit worried, don't worry. Using your personal Facebook account is only used to confirm your identity and acts as a security measure more than anything else.
Your coworkers will not be given access to your personal profile or be able to view your personal Facebook activity unless you are friends with them outside of Business Manager. All they will be able to see is your name and work email that you provide within Business Manager.
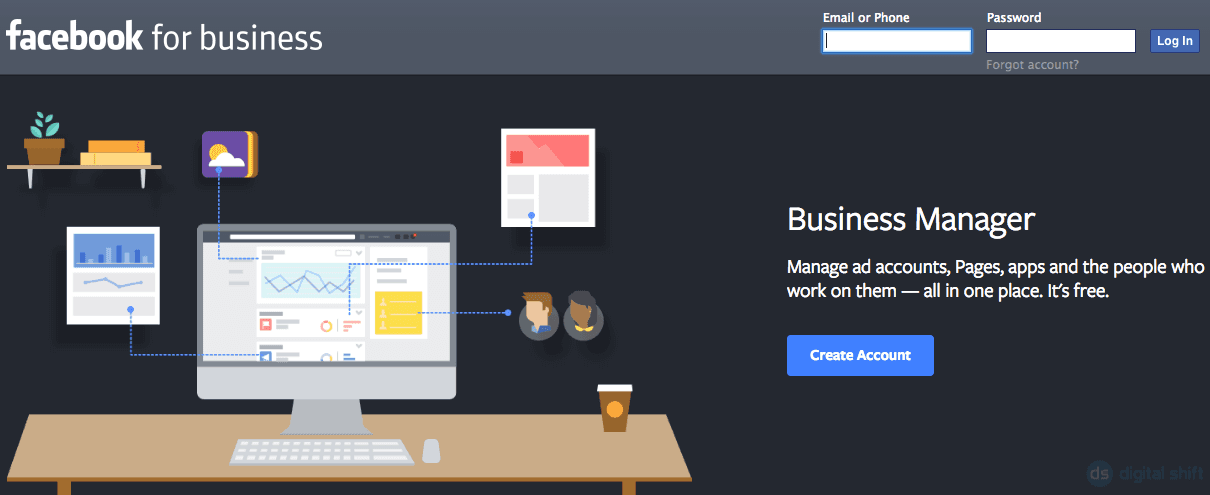
Sign up for Business Manager by going to business.facebook.com and click the "Create Account" button.
Login To Your Account If You're Not Already Logged In
Now, if you tried creating an account without logging through your personal one first, you will see the following screenshot below. Again, as this is for security purposes, log into your personal Facebook account and continue to step 2.
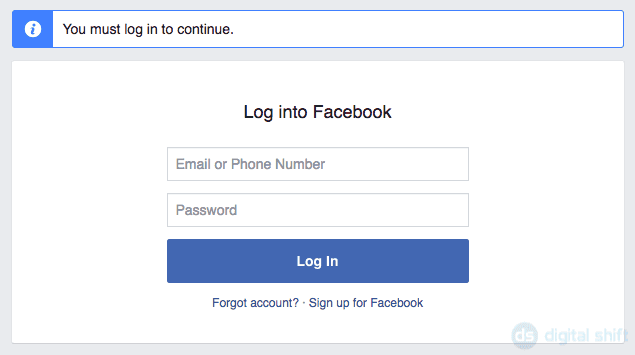
After successfully logging in, you will be eligible to create your business manager account.
Step 2: Create Your New Business Manager Account
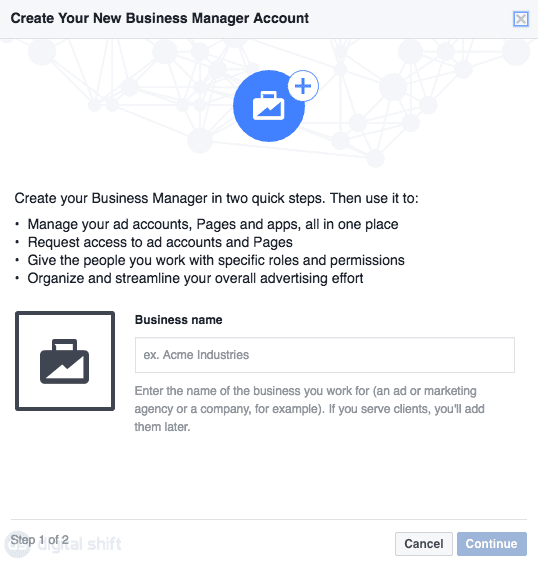
Once you've logged in, you will be asked to create your business manager account. The following screenshot should be what you see on your screen. As you can see, your Facebook Business manager account gives you access to a lot of benefits.
Enter Your Business Name
Now, put in your Business Name and click continue. Make sure your business name is consistent. This includes capitalization in the correct places. Make sure to double check the spelling as errors in this early stage can be a pain to fix later on.
Create Profile
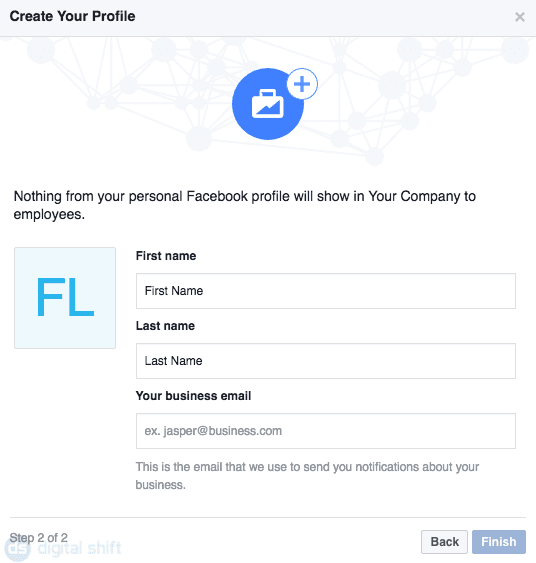
This step requires you to fill in some personal information. Again, Facebook will ensure that nothing from your personal Facebook account can be seen by your employees and co-workers. Fill in your first and last name and your business email and click finish!
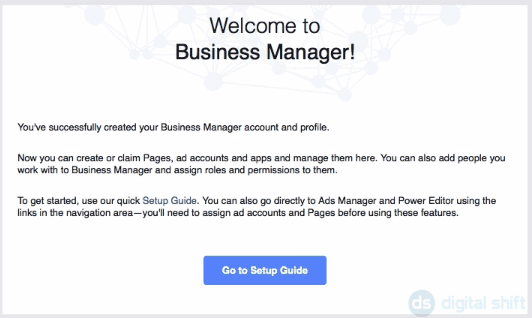
After you've clicked on Finish, you will be directed to the Business Manager welcome screen. Your account is now ready to go! So, click on setup guide to get access to your or your client's pages, accounts, and apps!
Now that you've successfully created your Facebook Business Manager Account, the time has come to take a look at your three options. With Business Manager, you can now easily request, claim, or add new assets depending on the goals of your business.
What Are Your Options With Your Business Manager Account?
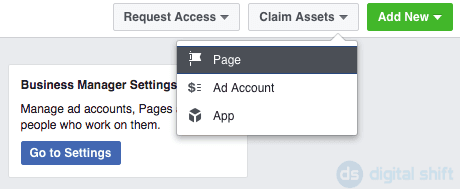
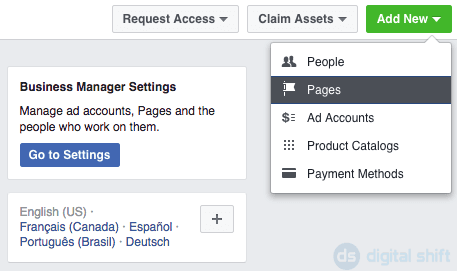
Having successfully set up your business manager account, you can now continue to create, request, or claim your first asset! Look at the top right-hand corner of your screen. You will see three options: Request Access, Claim Access, and Add New.
If you are requesting access, it means that the original owner will still have full administrative control. Claiming an asset will give you full administrative access. Regardless of what you click on, you will be able to request or claim three assets: page, ad account, or app. Click on the appropriate option for you.
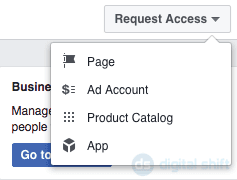
The Add New option does not only allow you to add a new page and ad account. You can also add people, product catalogs and payment methods. If you are the owner of the page, you can add people to accounts and give them access to different options. If you are requesting access to an asset, a request for access will be sent out and you will be notified once it is accepted. Once the request is accepted with an assigned role, that individual will be able to manage the asset.
Now that you have a better idea of what you can do with your newly created business manager account but got lost in the sea of options, we got you covered. Check out our other blog pages on how you can create a Facebook ad account, start managing your own Facebook ads, and creating your first business page!
Start Adding People
Once you're comfortable with your new Facebook Business Manager account, start adding your team to your business. By going to "add new" and clicking on "pages", you should see the following on your screen.
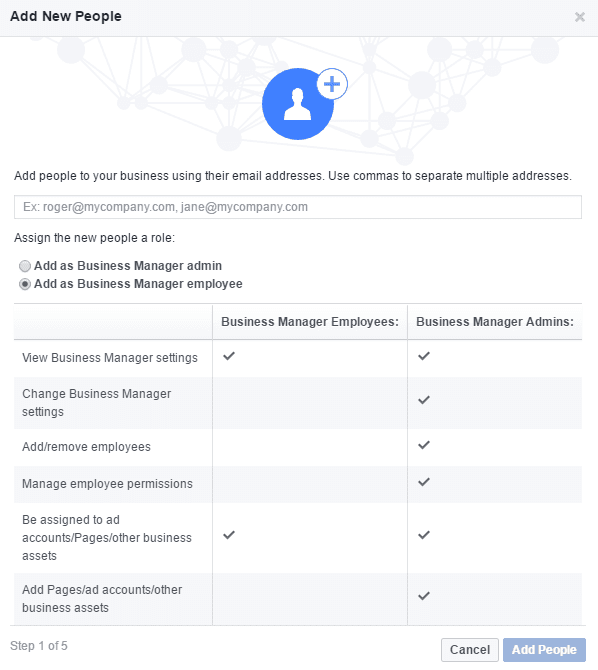

After inputting their email address, you will be asked to assign pages, ad accounts, and product catalogs. Select all the pages that you want each individual to work on and click Next. You will then be assigning the appropriate ad accounts and product catalogs to these individuals if applicable. If not, feel free to skip these steps. At the end, you will get a window saying that these individuals have received an invitation to manage these accounts. Feel free to share our blog post on how to create a Facebook Business Manager account on your preferred social media channel!
